I have a confession to make. Every year, around mid-March, I get this overwhelming urge to turn my kitchen into a chaotic art studio. I’m not talking about a few crayons and a coloring book; I’m talking about a full-blown, dye-stained, glitter-covered explosion of creativity.
Growing up, Easter egg decorating meant one thing: those flimsy wire dippers and fizzy vinegar tablets that smelled like a science experiment gone wrong. We loved them, of course, but as I’ve gotten older (and arguably pickier about my home aesthetics), I’ve realized that the humble egg is actually a perfect blank canvas. It’s a tiny, fragile opportunity to express your personal style.
I warn you, once you start looking at eggs as decor objects rather than just breakfast, it becomes addictive. You start seeing textures and color palettes everywhere. I’ve rounded up 20 of my absolute favorite design ideas that bridge the gap between “fun family activity” and “chic table centerpiece.” Let’s get messy.
The Natural & Organic Collection
1. Old-World Onion Skin Dye
I know, it sounds a bit odd—using trash to dye your eggs? But hear me out. The deep, rich amber and rusty orange hues you get from onion skins are unlike anything you can buy in a bottle. It feels like magic every single time I unwrap them.
Materials:
- White eggs
- Skins from 10-12 yellow onions
- Vinegar
- Nylon stockings
- Small leaves or flowers (fern or cilantro work beautifully)
Steps:
- Boil the onion skins in water with a splash of vinegar for 30 minutes to create the dye bath.
- Press a leaf flat against the eggshell.
- Carefully wrap the egg in a piece of nylon stocking and tie it tight to hold the leaf in place.
- Boil the wrapped eggs in the dye bath for 10-12 minutes.
- Unwrap to reveal a stunning botanical silhouette against a terracotta background.
2. The “Blueberry Night” Natural Dye
If you want a moody, sophisticated blue that looks straight out of a high-end design magazine, you need blueberries. I was skeptical the first time I mashed up perfectly good fruit for this, but the resulting grayish-indigo color is breathtaking.
Materials:
- Frozen blueberries
- Water
- White vinegar
- Hard-boiled eggs
Steps:
- Simmer 2 cups of blueberries with 2 cups of water for 15 minutes.
- Strain the liquid into a bowl and add a tablespoon of vinegar.
- Let the liquid cool to room temperature.
- Submerge your eggs. Leave them in for 30 minutes for a pale blue, or overnight in the fridge for a deep, midnight indigo.
3. Speckled Robin’s Eggs
There is something so charming about a speckled egg. It feels rustic and farmhouse-chic without trying too hard. I used to try painting these dots by hand until I discovered the “flick” method. It’s messy, but oh-so-satisfying.
Materials:
- Dyed eggs (pale blues or greens work best)
- Brown acrylic paint
- An old toothbrush
- Water
Steps:
- Thin down a little brown paint with water.
- Dip the toothbrush into the paint.
- Hold the brush near the egg and run your thumb along the bristles to flick tiny splatters of paint onto the shell.
- Let dry completely.
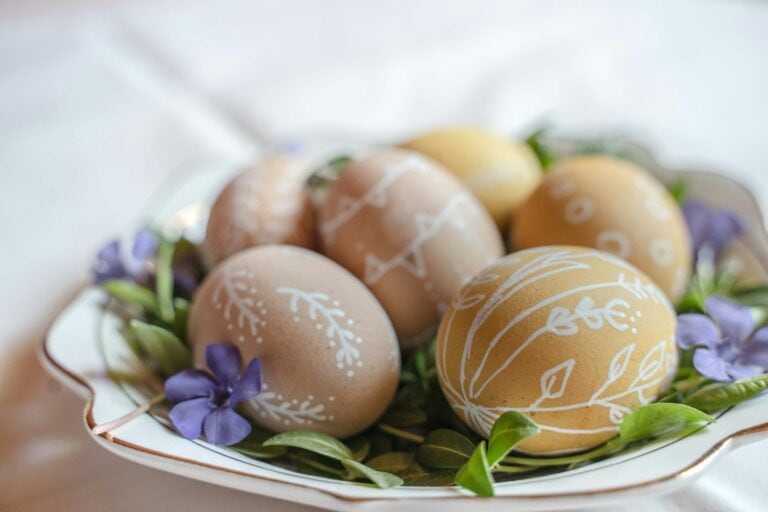
4. Minimalist Feather Decoupage
I’m a sucker for texture. Sometimes color just isn’t enough. Adding a tangible element like a small feather brings a softness to the table setting that paint just can’t achieve.
Materials:
- White or brown eggs
- Small craft feathers (guinea fowl feathers look amazing)
- Mod Podge (matte finish)
- Paintbrush
Steps:
- Apply a thin layer of Mod Podge to the spot where you want the feather.
- Gently press the feather onto the egg, smoothing it down from the center outward.
- Brush another thin layer of Mod Podge over the top to seal it.
The Glamour & Shine Edit
5. Gilded Gold Leaf
Okay, get ready for a little shock: gold leaf is actually incredibly easy to use. It looks expensive and intimidating, but it’s quite forgiving. I love the way the gold catches the candlelight at dinner—it turns a simple egg into a jewel.
Materials:
- Dyed or natural eggs
- Gold leaf sheets
- Metal leaf adhesive (sizing)
- Two soft paintbrushes
Steps:
- Paint random, abstract strokes of adhesive onto the dry egg.
- Let it sit until it gets tacky (usually 10-15 minutes).
- Lay a sheet of gold leaf over the egg and gently pat it down with a dry brush.
- Brush away the excess leaf flakes to reveal your gilded design.
6. Metallic Markers Doodles
Sometimes we overcomplicate things. I’ve found that simply sitting down with a metallic marker can produce some of the most striking designs. It’s therapeutic, too—just you and the repetitive motion of drawing lines.
Materials:
- White eggs
- Gold, silver, or copper permanent markers
Steps:
- Ensure the egg is completely dry and room temperature (to avoid condensation).
- Draw geometric patterns, tiny dots, or cursive script directly onto the shell.
- I love doing simple vertical lines or covering the whole egg in tiny triangles.
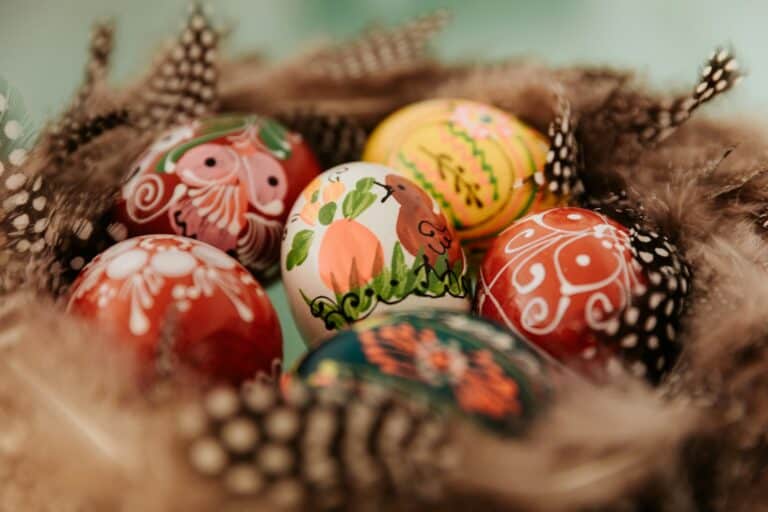
7. The “Galaxy” Egg
This one is for the dreamers. It’s dark, moody, and sparkling. I made these last year, and my guests couldn’t stop staring at them. It’s a little messy, but the depth of color you get is incredible.
Materials:
- Eggs painted black (acrylic paint)
- Sponge brushes
- Blue, purple, pink, and white acrylic paint
- Glitter (optional)
Steps:
- Paint the egg solid black.
- Sponge on patches of blue and purple to create a nebula effect.
- Dab a little pink for highlights.
- Use a stiff brush to flick white paint (stars) over the top.
8. Wire Wrapped
This isn’t a dye technique, but a structural one. I saw this in a boutique window once and thought, “I can do that.” It adds an industrial, modern edge to your decor.
Materials:
- Blown-out eggs (hollow) or wooden eggs
- Thin wire
- Hot glue gun
Steps:
- Put a tiny dot of glue at the top of the egg to anchor the wire.
- Start wrapping the wire around the egg. You can do messy, abstract loops or tight, neat coils.
- Anchor the end with another dot of glue.
The Modern & Graphic Mix
9. The Stamped Egg
Words have power, even on eggshells. Stamping short, sweet words onto eggs gives them a modern, typographic feel. I like using cheeky phrases or guests’ names for place settings.
Materials:
- White eggs
- Small rubber letter stamps
- Black ink pad
Steps:
- Decide on your word or phrase.
- Carefully stamp the letters onto the shell.
- Don’t worry if the ink smudges slightly or the letters aren’t perfectly straight—that “typewriter” look adds character.
10. Washi Tape Geometrics
I probably own more rolls of Washi tape than I should admit. It’s the perfect material for this because it’s low-tack and comes in endless patterns. This is the cleanest, easiest method on this list.
Materials:
- White eggs
- Washi tape in various colors/patterns
- Scissors
Steps:
- Cut the tape into small triangles, squares, or long thin strips.
- Apply them to the egg in a random mosaic pattern or structured stripes.
- Smooth down the edges with your fingernail.
11. Black & White Sharpie Minimalist
There is a stark beauty in black ink on a white shell. It reminds me of those intricate adult coloring books. I find this one particularly relaxing to do with a glass of wine in the evening.
Materials:
- White eggs
- Fine-point black permanent marker
Steps:
- Draw botanicals, faces, or abstract lines.
- One of my favorites is drawing a simple “sleeping eye” with lashes on the front. It’s so simple but looks adorable.
The Texture & Textile Vibe
12. Silk Tie Transfer
This is the one that always shocks people. You can actually transfer the pattern from an old silk tie directly onto an egg. It sounds impossible, but science is on our side here. I scour thrift stores just for ugly ties with cool patterns specifically for this.
Materials:
- 100% silk ties (must be silk!)
- White cloth (old sheets work)
- White eggs
- String or rubber bands
- Water & Vinegar
Steps:
- Cut a piece of silk large enough to wrap the egg.
- Wrap the egg with the patterned side facing the shell. Tie it tight.
- Wrap a piece of white cloth over the silk and tie again.
- Boil in water with 1/4 cup vinegar for 20 minutes.
- Unwrap to see the pattern transferred perfectly.
13. Napkin Decoupage
Have you ever seen a paper napkin with a pattern so pretty you didn’t want to use it? This is the solution. It makes the egg look like hand-painted porcelain.
Materials:
- White eggs
- Patterned paper napkins
- Mod Podge
- Brush
Steps:
- Separate the layers of the napkin so you only have the thin, printed top layer.
- Cut out the motifs (flowers, bunnies, etc.).
- Paint Mod Podge on the egg, place the paper, and seal with more Mod Podge.
14. Crochet Eggs
Ok so not exactly your typocal easter egg but If you can crochet or knit, making tiny hats or covers for your eggs is the coziest thing imaginable. But for those of us who can’t, wrapping them in yarn works too.
Materials:
- Plastic or wooden eggs (easier for gluing)
- Textured yarn
- Glue
Steps:
- Apply glue to the top of the egg.
- Spiral the yarn tightly from the top down, ensuring no gaps show through.
- Mix textures and colors for a boho look.
15. Rubber Band Resist
This is a classic technique I’ve reinvented by using wider rubber bands and monochromatic color schemes. It creates crisp, negative-space lines that look very architectural.
Materials:
- Eggs
- Wide and thin rubber bands
- Dye bath
Steps:
- Wrap rubber bands tightly around the egg in various directions.
- Dunk in dye.
- Remove, dry, and take off the bands.
- For a two-tone look, remove the bands and dip in a lighter color dye for just a few seconds.
The Just Plain Fun
16. Shaving Cream Marbling
Talk about sensory play! This method is messy, chaotic, and yields a different result every time. It creates a swirling, psychedelic marble effect that is impossible to replicate by hand.
Materials:
- Shaving cream (foam, not gel)
- Food coloring
- A baking dish
- Toothpick
Steps:
- Fill the dish with shaving cream and smooth it out.
- Drop various colors of food coloring onto the foam.
- Swirl with a toothpick.
- Roll the egg through the foam. Let it sit for 10 minutes, then rinse off.
17. Temporary Tattoo Eggs
I stumbled upon this idea when my niece left her temporary tattoos on my table. It is ridiculously easy. If you can put a fake tattoo on a toddler’s arm, you can make these designer eggs.
Materials:
- White eggs
- Temporary tattoos (floral or geometric work best)
- Wet sponge
Steps:
- Peel the plastic off the tattoo.
- Place the image face down on the egg.
- Press the wet sponge against the back for 30 seconds.
- Peel away the paper backing.
18. The Cactus Egg
I live for a bit of whimsy. Turning eggs into tiny cacti is just adorable, especially if you arrange them in little terracotta pots. It’s a great conversation starter.
Materials:
- Eggs dyed green
- Black fine-tip marker
- Pink tissue paper
- Glue
Steps:
- Dye eggs various shades of green.
- Use the marker to draw little “x” or lines to represent spines.
- Crumple a tiny piece of pink tissue paper and glue it to the top as a flower.
19. Chalkboard Eggs
This is the ultimate customizable egg. Painting them with chalkboard paint means you (or your kids) can change the design every hour if you want. It’s interactive decor!
Materials:
- Eggs (wooden or paper mache work best for durability)
- Black chalkboard paint
- Chalk or chalk markers
Steps:
- Paint the egg with two coats of chalkboard paint.
- Let it cure for 24 hours.
- Draw whatever you want—menus, names, or doodles.
There you have it—20 ways to elevate your Easter game. Whether you’re drawn to the moody blues of the blueberry dye or the sharp lines of the Washi tape, I hope this inspires you to look at that carton of eggs a little differently.
Remember, the goal isn’t perfection. If the gold leaf rips or the dye is a little splotchy, that’s just part of the charm. It’s about creating something with your hands that brings a little joy to your space. Now, if you’ll excuse me, I have some onion skins boiling on the stove and a very messy kitchen to attend to. Happy decorating